As an Amazon Associate, we earn from qualifying purchases. Some links on this site are affiliate links at no extra cost to you. Our recommendations are based on thorough research and editorial judgment.

Clean Removal Techniques: Avoiding Residue and Surface Damage
Start by identifying the surface and tape type. Use warm soapy water (1 tbsp mild detergent per 1 L warm water) for light residue, or 70% isopropyl alcohol for tougher films. Apply heat from a hair dryer at 40–60°C held 15–30 cm away to soften adhesives, then lift at a 45° angle with a plastic scraper to avoid paint lift or fiber damage. Test solvents on an inconspicuous spot first. Follow preventive storage and removal timing, and further steps come next.
Key Takeaways
- Identify the surface and tape/adhesive type before starting removal to choose a compatible method and solvent.
- Start with warm soapy water and gentle lifting (45° angle) to minimize finish damage and fiber lifting.
- Apply heat (hair dryer) from 6–12 inches to soften adhesive, then use a plastic scraper or microfiber cloth.
- Use mild solvents first (70% isopropyl alcohol, diluted vinegar), testing an inconspicuous area before full application.
- Prevent residue by using low-tack tapes, removing adhesives within 24–72 hours, and storing tapes in cool, dry conditions.
Understanding Cleaning, Disinfecting, and Sanitizing
You may be interested


Many routines begin with cleaning, the step that comes to the rescue when surfaces look and feel dirty. Cleaning removes dirt, dust, and impurities using soap and water, typically a 1:40 detergent-to-water ratio for light soils. Disinfecting follows when killing germs is required, using EPA-registered agents at manufacturer concentrations, often 0.1% sodium hypochlorite for 1 minute contact time. Sanitizing lowers microbial counts to safe levels; it may use either cleaning methods or disinfecting steps, for example quaternary ammonium at 200 ppm for 10 seconds. Each process serves a distinct role, cleaning removes visible debris while disinfecting and sanitizing target pathogens, and understanding these differences is essential for infection control. Choose the appropriate cleaning solution and method for consistent, measurable results. The use of high-density polyethylene materials in sun shade sails demonstrates the importance of choosing durable materials that provide UV protection while maintaining effectiveness.
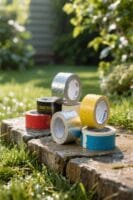
Types of Surfaces and How They React to Adhesives

After cleaning, disinfecting, and sanitizing steps come decisions about what to do when adhesives are present on different materials. Porous materials like unfinished wood absorb glue, so removal risks fiber lifting; test a 1 cm area first and use gentle solvents at 5–10% concentration. Non-porous surfaces such as glass or glazed tile release residues more easily, a plastic scraper and isopropyl alcohol (70%) often suffice. Painted walls and fabrics are delicate; strong solvents can strip paint or dye, so solvent-free adhesive removers or warm soapy water are preferred. Metals and hard plastics tolerate harsher removers, follow manufacturer limits of 40°C to avoid warping. Matte finishes grip residues more than glossy ones. Removable tapes, e.g., painter’s tape, usually come to the rescue without harm. Residue-free removal is a key feature of some white duct tapes, ensuring a clean finish and maintaining surface integrity.
Common Causes of Sticky Residue

Identify the source before attempting removal. Adhesives that dry unevenly cause sticky residue, for example tape adhesive left 24–72 hours will harden on contact surfaces. Labels and stickers are common sources, old decals on windows or vehicles often leave a tacky film after months. Residue traps dust and grime, creating buildup measurable in millimeters that dulls finish. Strong-bond adhesives may chemically crosslink, resisting simple water-based cleaning products, so their composition affects method choice. Prompt action reduces required effort; remove within days rather than months when possible. In homes and workplaces monitor high-use areas like handles and trim, inspect annually, and document residue thickness and substrate type, helping determine whether solvent, heat, or mechanical methods should come to the rescue. Battery-powered designs reduce maintenance challenges, making them a viable option for effective yard maintenance solutions.
Tools and Supplies for Safe Residue Removal

When preparing to remove sticky residue, assemble a compact kit with microfiber cloths, a plastic scraper, and a selection of solvents suited to the surface. Microfiber cloths are soft, lint-free, and capture adhesive particles; use 320–400 GSM for durability. Include a plastic scraper or old credit card to lift edges gently, avoiding metal tools that may gouge. Stock solvents: isopropyl alcohol 70–90% for many plastics and glass, white vinegar diluted 1:1 for painted wood, and a mild commercial adhesive remover for stubborn residues. Add low-tack painters’ tape for temporary labels to come to the rescue, and nitrile gloves to protect skin. Always perform a spot test in an inconspicuous area before broader Surface cleaning or full-surface cleaning. Consider the adhesive strength and durability of Velcro strips to prevent excessive residue during removal.
Recommended Products

✔️【 HIGHLY ABSORBENT, EASY TO CLEAN 】Clean smarter not harder. These super soft, non-abrasive microfiber cloths pack a punch. Cleans deep, but won't damage delicate surfaces. Perfect for dusting, scrubbing, polish and drying your entire home, office and car with less effort! Works great with home, kitchen and for car/auto detailing.

✔️【 HIGHLY ABSORBENT, EASY TO CLEAN 】Clean smarter not harder. These super soft, non-abrasive microfiber cloths pack a punch. Cleans deep, but won't damage delicate surfaces. Perfect for dusting, scrubbing, polish and drying your entire home, office and car with less effort! Works great with home, kitchen and for car/auto detailing.

COMPLETE MICROFIBER CLEANING KIT: Includes Microfiber Wash Pads, XL PFM Edgeless Drying Towel, PFM Terry Weave Towels, Wax Removal Towels, Microfiber Plush Edgeless Towels, Interior Towels, Shop Towels, and Microfiber and Foam Pad Cleaner
Warm Soapy Water and Gentle Mechanical Methods

Building on the compact kit of cloths, scrapers, and solvents, a simple soap-and-water approach often comes to the rescue for most sticky residues on everyday surfaces. A solution of one teaspoon mild dishwashing liquid per cup (240 ml) warm water loosens adhesive bonds safely. Allowing the solution to sit five to ten minutes improves softening. A microfiber or soft cloth is used to rub gently in circular motions, preventing abrasion on painted walls or countertops. For stubborn spots, a plastic scraper or the edge of a credit card lifts residue without scratching. Repeat wetting and gentle scraping until residue releases. Rinse the area with clean water and dry with a soft cloth to remove soap film and restore surface finish. Selecting compatible rolls with dispensers ensures smooth application and reduces jams, which can help avoid leaving sticky residues.
Using Oils to Soften and Remove Adhesives
Apply a small amount of oil to the adhesive and allow it time to penetrate the bond. Oils such as olive or coconut come to the rescue for many residues, and they soften adhesives without harsh chemicals. Apply roughly 5–10 drops or a pea-sized amount for a coin-sized patch, then wait three to ten minutes depending on thickness. Gently rub with a soft cloth in circular motions to lift loosened residue, avoiding abrasive action that might scratch. Essential oils like eucalyptus offer an eco-friendly alternative safe on most surfaces, but always spot-test first on an inconspicuous area for five minutes. If residue persists, repeat application and allow longer dwell time, monitoring surface compatibility and removing excess oil with mild detergent and warm water to finish. For optimal preservation of blade geometry and edge, ensure that cutting tools are regularly maintained by cleaning, oiling, and sharpening according to the specific bevel angle.
Solvents: Isopropyl Alcohol, Acetone, and When to Use Them
Oils can soften many adhesives, but some residues need stronger agents to break their bonds. Isopropyl alcohol residue often comes off glass, metal, and some plastics with 70–90% isopropyl solutions, applied sparingly on a lint-free cloth. Acetone dissolves tougher adhesives and can come to the rescue for hardened glue or paint-transfer, but it can melt or discolor painted and many plastic surfaces. Test solvents on a hidden spot first. Apply with a soft cloth and use gentle circular motions, avoiding abrasive scrubbing that risks scratches. Work in a well-ventilated area, venting to 6–8 air changes per hour if possible, and limit exposure to short sessions under 15 minutes. Dispose of solvent-soaked rags safely, following local hazardous-waste rules. When considering outdoor solutions, high-density polyethylene is a durable material often used in shade sails, offering weather resistance while allowing airflow.
Recommended Products
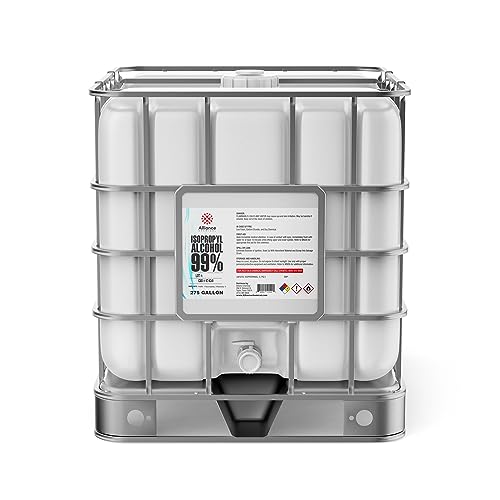
Exceptional Purity for Precision Applications: Our Isopropyl Alcohol 99% offers unparalleled purity, ideal for scientific, technical, and industrial tasks that require a solvent of the highest grade, ensuring accuracy and effectiveness in each application.

USP Medical Grade Quality: Alliance Chemical's Isopropyl Alcohol is formulated to meet the stringent standards of the United States Pharmacopeia (USP) for medical grade products, ensuring its suitability for healthcare, laboratory, and rigorous industrial applications.

Precision Chemical: Essential for precise chemical analysis, Isopropyl ACS Reagent Grade 99.9% provides a reliable solvent for titrations, assays, and other analytical techniques.
Heat Techniques: Hair Dryers and Heat Guns Safely Applied
How should heat be applied to soften adhesive without harming the surface? Heat techniques use hair dryers or heat guns to soften tape adhesive safely. Maintain a distance of about 6–12 inches (15–30 cm) from the surface to avoid overheating. Apply heat in short intervals of 10–20 seconds, then check the temperature with a hand or infrared thermometer. This approach is best for non–heat-sensitive materials like metal or glass, where gentle warming can make adhesive come to the rescue. Avoid plastics and rubber, which can warp or melt under similar conditions. Always test on a small, inconspicuous area first to confirm compatibility. Monitor surface temperature, keep heat moving, and stop if discoloration, warping, or smoke appears. For tapes designed for harsh conditions, such as 3M Venture Tape Aluminum Foil Tape, ensure the material is suitable for heat application to prevent damage.
Recommended Products

CLASS-A FIRE RATED & ENERGY SAVING: Sprayman Spray Coat is a closed-cell polyurethane spray foam insulation with Class-A Fire Rating, tested according to ASTM E84 standards. Designed for trusted safety and high performance, it provides advanced flame resistance for roofs, walls, basements, tanks, and more. Its excellent roofing and wall insulation performance helps boost comfort, safety, and energy efficiency while reducing heating and cooling costs by up to 40%–60%, depending on application conditions.
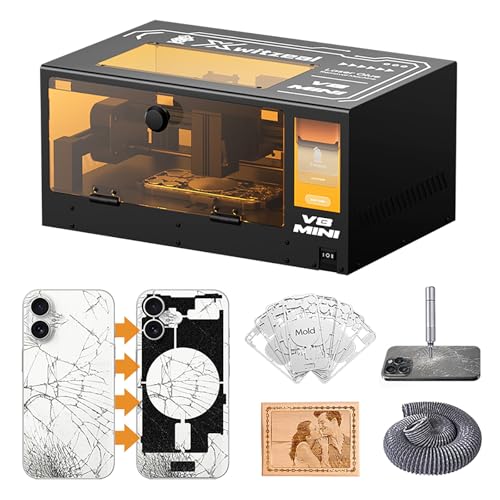
UPGRADED V8MINI PHONES REPAIR LASER MACHINE: It removes adhesive 60% faster than the V8 model, completing glue removal in just 7 minutes. No professional assembly is required, making it ideal for phone repair shops and maximizing work efficiency.

The most authentic carbon fiber pattern on the market, an exlusive to VviViD Vinyls. Ths is a 3-layer combo CAST vinyl with a durable high gloss lamination for a hyper-realistic carbon fiber look.
Removing Tape From Painted, Wood, Glass, and Fabric Surfaces
Begin by identifying the surface and tape type before starting removal. For painted surfaces, pull the tape slowly at a 45-degree angle to reduce paint peeling, use steady pressure, and stop if paint lifts. For wood surfaces, test a 1-inch square in an inconspicuous spot first, particularly with duct tape, to check finish compatibility. For glass surfaces, use a plastic card or scraper with a 1–2 mm bevel to lift edges without scratching, work across the pane in 5–10 cm increments. For fabric surfaces, start at a corner and peel gently to prevent fraying; move slowly over seams. Heat can soften adhesive and come to the rescue, but keep temperatures under 60°C for sensitive paints and plastics to avoid damage. Clear packing tape, like the FugaCity Heavy Duty Clear Packing Tape, offers a seamless and professional appearance while ensuring durability during transport.
Recommended Products

"Stronger & Faster Performance: StripOxy 6842 offers a more powerful, quicker stripping action than StripOxy 6840 at the same temperature, delivering efficient results for demanding coating removal tasks."

Alliance Chemical Xylene is a high purity technical grade solvent, often referred to as 1971 solvent or xylol for industrial chemical processes.

99.9+% Pure, Powerful Industrial Grade, High Strength
Preventive Measures to Avoid Future Residue
After removing tape and inspecting the surface, plan steps to prevent future residue before reapplying any adhesive. Choose removable, low-tack tapes rated for temporary use, such as 3–7 N/25 mm peel strength, to minimize residue risk. Remove labels and stickers within 24–72 hours. Prompt removal prevents stronger bonding over time. Store adhesives in cool, dry places, 15–25°C and 30–50% relative humidity, to preserve tack and reduce breakdown. Implement routine surface inspections weekly, check edges and corners for early build-up. Regular cleaning with mild detergent and water removes loose dirt and oils, use 1:100 diluted cleaner for painted surfaces. For delicate materials, test a 1 cm² area first. Keep a simple removal kit on hand, to come to the rescue promptly. It is important to test small patches before full application to confirm compatibility and adhesion.
Eco-Friendly and Non-Toxic Removal Alternatives
Looking for safe options that really work, one should consider simple, eco-friendly solvents first. Vinegar (5% acetic acid) dissolves many adhesive residues; apply 1–2 tablespoons, wait 5–10 minutes, then wipe. Baking soda forms a mild abrasive paste when mixed 1:1 with water, come to the rescue for stuck spots. Eucalyptus oil breaks down sticky films, use 5–10 drops on a cloth, test first on an inconspicuous area. Warm soapy water, with 1 teaspoon mild dish soap per cup of water, is gentle on painted walls and counters. Isopropyl alcohol (70–90%) evaporates quickly, effective on glass and metal. Natural oils like coconut or olive oil soften adhesives; rub for 2–5 minutes, then wash with soap. Test surfaces before full use.
Troubleshooting Stubborn Residues and When to Seek Professional Help
Frequently, stubborn adhesive residues resist simple wiping and need stepwise troubleshooting. Begin with warm soapy water, using a cloth dampened in 100–120°F (38–49°C) water and 1 tsp mild detergent per liter, let sit 5–10 minutes. Try isopropyl alcohol (70%) next; apply with a cotton pad, blot, do not rub hard. Test vinegar or commercial adhesive remover on a hidden area for 30–60 seconds to check discoloration. For fabrics or painted surfaces, use a plastic scraper and low pressure, 5–10 strokes maximum. If residues persist after 2–3 attempts, seek professional help. Cleaning services come to the rescue with commercial-grade solvents and controlled methods, protecting delicate materials and avoiding surface damage.
Recommended Products

Industrial-Strength Adhesive Remover – Dissolves and lifts off tough residue fast without the need for soaking. Effective on glue, grease, oil, ink, and sticker or tape residue, so you can clean up stubborn messes in seconds.
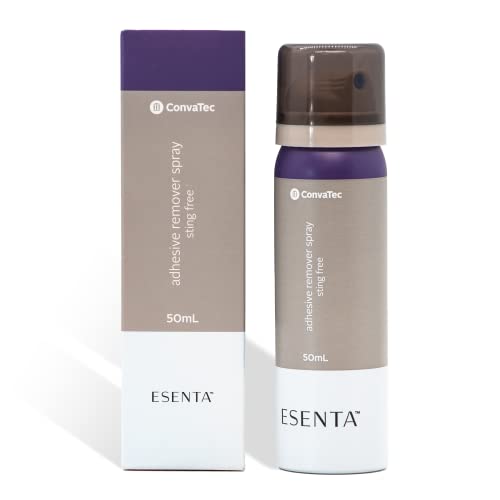
MEDICAL ADHESIVE REMOVER softens residue from stomas and sticky wound care tape that you use at home every day

Adhesive Tool Cleaning: AdvanTech Polyurethane Foam Cleaner is designed as a subfloor adhesive gun cleaner, dispensing gun maintenance, and spray foam cleaner fluid
Frequently Asked Questions
What Are the Four Basic Cleaning Techniques?
Like a well-tuned orchestra, the four basic cleaning techniques are dusting, wiping, vacuuming, and mopping, each essential for surface care; these cleaning strategies balance debris removal, sanitation, air quality, and floor maintenance effectively.
What Are the 7 Common Methods of Cleaning?
The seven common methods of cleaning are dusting, wiping, vacuuming, mopping, scrubbing, steaming, and using specialized cleaning agents. The observer notes appropriate cleaning materials and considers residue types to prevent surface damage.
What Are the Techniques of Cleaning Various Surfaces?
Gently suggestive, one recommends: tailor methods by surface types — glass with damp microfiber, electronics dry-dusted, floors wet-mopped, upholstery spot-treated, countertops non-abrasive-wiped — selecting appropriate cleaning tools to prevent damage and residue.
What Are the Methods of Surface Cleaning?
Dry and wet methods are used: dry techniques like laser, plasma, dry ice blasting; wet techniques like ultrasonic, dip, wipe, spray, and mopping. Surface sanitization often employs appropriate cleaning solutions to guarantee effectiveness and protect substrates.


