As an Amazon Associate, we earn from qualifying purchases. Some links on this site are affiliate links at no extra cost to you. Our recommendations are based on thorough research and editorial judgment.

How to Plan Outdoor Lighting Design for Your Garden
A practical plan begins by defining goals: safety lights for paths at 10–30 lux, accent uplights 3–6 feet from focal points, and energy-efficient LEDs at 2,700–3,000K. Draw a scaled site map showing paths, trees, beds, and fixture locations, then pick fixtures—path lights 18–24 inches high, accent bullets, and uplights for trees. Use low-voltage with a transformer sized 20% above total wattage, bury cables six inches, and add timers or motion sensors to save energy; more specifics follow.
Key Takeaways
- Define functional, aesthetic, and security goals (safety paths, accent focal points, and dusk-to-dawn/motion security lighting).
- Draw a scaled site map marking paths, focal points, fixture locations, and wiring routes for precise planning.
- Choose appropriate fixtures and bulbs: path lights 100–200 lm, accents 50–300 lm, warm 2700–3000K LEDs.
- Size transformers and wire runs to limit voltage drop, add 20% transformer margin, and use proper gauge per run length.
- Prioritize weatherproof fixtures, sealed connectors, GFCI protection, and routine maintenance for safety and longevity.
Understanding the Goals of Your Garden Lighting
You may be interested
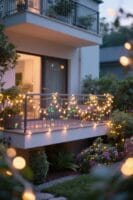


When planning garden lighting, it helps to begin by defining clear functional and aesthetic goals. Goals clarify outdoor lighting needs and prioritize tasks like illuminating pathways and entry points for safety. Aesthetic aims highlight trees and features using accent lights placed 3–6 feet away for depth, or uplights at trunk bases to reach 8–12 feet. Security objectives call for motion sensors, dusk-to-dawn fixtures, and 10–30 lux near doors to deter intruders. Energy efficiency reduces running costs by specifying LED bulbs, 2700–3000K color temperature, and 5–15W fixtures equivalent to 40–100W incandescent. Landscape lighting design balances contrast and glare, keeping beam angles under 30 degrees and spacing fixtures 6–12 feet apart for even coverage and pleasant ambiance. Consider incorporating weather-resistant materials for outdoor lighting to ensure durability and longevity against seasonal elements.
Creating a Site Map and Fixture Plan

Start by drawing a scaled site map showing paths, trees, beds, and focal points to guide fixture placements. Mark potential fixture locations with flags or on the map, noting desired lighting effects and distances, aim for at least 20 feet between fixtures to prevent light pooling. Include pathway lights for walkways and accent lights for plants and features, specifying beam angles and mounting heights for each role. Group fixtures by proximity to the transformer to maintain consistent voltage levels, calculate cable runs to limit voltage drop, and plan transformers centrally when possible. Annotate the map with fixture types, wiring routes, and exact measurements to streamline installation and future maintenance. Consider using reinforced corner bead tapes for high-traffic areas to enhance durability and damage resistance in your garden’s structural features.
Choosing Fixture Types for Different Areas

After laying out the site map and noting fixture locations, the next step is to choose fixture types suited to each area. Path lights on 18–24 inch posts provide safe navigation without harsh glare. Accent lighting, such as bullet lights, highlights trees, sculptures, and flower beds, creating points of interest in the yard. Well lights installed in the ground uplight shrubs and architectural elements, offering subtle illumination from below. Wash lights cast soft, diffuse light on flat surfaces like walls and facades, enhancing texture and color. Downlights mounted high mimic moonlight and illuminate lawns and paths for gatherings. A balanced landscape lighting system mixes these fixture types, considers mounting heights and beam angles, and spaces fixtures for even coverage. For optimal results, choose heat-treated blades with dimensions typically including 8-10 inches wide to ensure durability and longevity in outdoor conditions.
Recommended Products

36 Clear Lights Included: PET Bulb Housing, With pressure and drop resistance, even light transmission, fast heat dissipation and dual filament high brightness design, it provides you with a long-lasting and stable lighting experience.
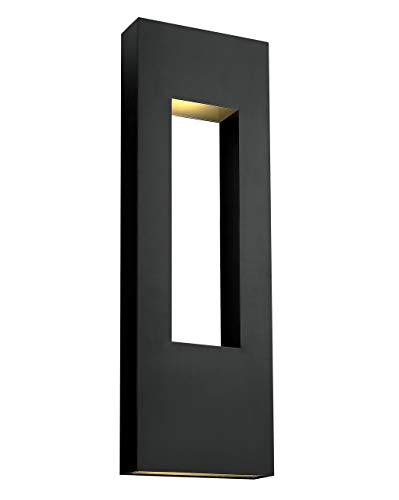
Modern Contemporary Design: The sleek modern design allows for optimal illumination to any outdoor space

Features three candelabra lights housed within clear, beveled, and bound glass panels that enhance brightness and create a sophisticated layered illumination effect, adding visual depth and elegance to outdoor environments such as walkways, entryways, and garden paths
Selecting Bulbs: LED Vs Halogen and Color Temperature

Selecting the right bulbs starts with choosing between LEDs and halogen options based on lifespan, heat, and wattage. LEDs are energy-efficient, using 1–11 watts and lasting up to 40,000 hours, while halogen consumes 20–60 watts and lasts about two years. LEDs emit less heat, making them safer for outdoor lights and fixtures near plants. Consider color temperature: warm 2,700K–3,000K creates inviting scenes, cooler 4,000K+ yields brighter, harsher highlights. Match lumens output to purpose: path lights 100–200 lm, accent 50–300 lm, flood 700–1,300 lm. Use LED fixtures to show architectural details without wasting power. Choose bulbs by required lumens, desired color temperature, and long-term energy savings. Solar fairy lights are an eco-friendly lighting solution that can be considered for outdoor spaces, providing illumination without electricity costs.
Low-Voltage Vs High-Voltage Systems: Pros and Cons

Which voltage is right for a given garden depends on scale and safety requirements. Low voltage systems run at 12 volts, reducing shock risk, and are simpler to install for small yards. They commonly use energy-efficient LED bulbs that draw 1–11 watts and last up to 40,000 hours. Installation costs are lower, and fixtures are easier to move, which can produce long-term savings on bills. High voltage systems run at 120 volts, handle higher wattage and longer runs with less voltage drop, so they suit large properties. They often use halogen fixtures consuming 20–60 watts with shorter lifespans. High voltage requires stricter safety precautions and more complex installation, but can deliver stronger output across expansive landscapes. When planning for outdoor lighting, consider using battery fairy lights with remote controls for versatile and portable décor options.
Wiring Methods and Transformer Sizing
Choosing the right wiring layout and transformer size completes the practical planning that began with voltage selection. Use wiring methods like Daisy Chain, T-Method, or Hub Method to connect fixtures efficiently while minimizing splices and optimizing power delivery. Keep total wattage per run between 100 and 150 watts to avoid excessive voltage drop over long distances. Select gauge wire based on run length; for example, use 12–14 AWG for runs over 50 feet, 16–18 AWG for shorter runs. Calculate transformer sizing by summing all bulb wattages and adding 20% margin, so a 120-watt total needs at least a 150-watt transformer. For large properties, place multiple transformers strategically to maintain voltage levels and simplify the lighting plan. Consider using Navona Heavy Duty hook and loop strips to organize cables and ensure a tidy and secure setup.
Placement Strategies for Pathways, Trees, and Architecture
When planning placement for pathways, trees, and architectural elements, start by mapping functional zones and sightlines to avoid conflicts between fixtures and landscape features. Place pathway fixtures about 6 to 8 feet apart for even illumination, ensuring safe navigation without overwhelming brightness. Uplighting trees uses well lights around bases to highlight trunks and foliage, avoiding direct ground beams that create harsh shadows. Downlighting from branches at 12 to 15 feet mimics moonlight, softly illuminating paths below while reducing glare. For architectural elements, set wall-wash lights 2 to 3 feet from surfaces to produce a gradual texture-enhancing gradient. Use accent lights at a 30-degree angle for sculptures or focal plants to reduce spill and sharpen form. These placement strategies balance function and aesthetics. When selecting lighting for outdoor use, consider IP44 waterproof rating to ensure durability in varying weather conditions.
Controls, Timers, and Motion Sensors
A well-planned control strategy brings automation and efficiency to garden lighting. Controls include smart systems that connect via Wi‑Fi or Zigbee, enabling remote app control, schedules, and group scenes. Timers are simple, reliable devices that turn lights on and off at set times; typical residential timers allow 15‑minute increments and 7‑day programming. Motion sensors come to the rescue for security lighting, detecting movement within 6–12 meters and triggering 10–90 second illumination periods. Photo sensors automate dusk‑to‑dawn operation by sensing ambient lux levels, commonly set between 5–30 lux. Dimmable fixtures paired with compatible dimmer switches permit 10–100% brightness adjustment. These combined controls improve energy efficiency, reduce run hours, and let outdoor lighting adapt to use patterns, weather, and safety needs. For optimal outdoor setup, consider using waterproof materials like PU-coated HDPE to ensure durability against light rain, similar to those used in shade sails.
Installation Best Practices and Safety Tips
Start by planning the power layout to assure safe, reliable operation of the lighting system. Place the transformer near a GFCI-protected outdoor outlet to add added safety and meet code. Use a minimum of 10-gauge wire for main runs to reduce voltage drop and preserve brightness. Bury low-voltage cables at least six inches deep to prevent damage and tripping hazards. Space light fixtures about 20 feet apart to form pleasing pools of light and avoid dark gaps. During landscape lighting installation, route cables to minimize crossings and keep connections dry, using sealed connectors where possible. After installation, regularly inspect light fixtures and wiring for wear, loose connections, or corrosion. For optimal yard maintenance, consider using a Worx Cordless String Trimmer and Edger to maintain clean and well-defined edges around your garden. These Lighting Installation Tips help assure durability and safe operation.
Maintenance, Troubleshooting, and Future Expansion
Routine care keeps an outdoor lighting system reliable and efficient. Regular maintenance includes cleaning fixtures, clearing vegetation, and inspecting for cracks or corrosion to guarantee peak light output. For troubleshooting, check connections and measure voltage at the transformer and at distant fixtures, aim for 12V ±10% under load for low-voltage systems. Replace burnt-out bulbs promptly to prevent voltage fluctuations and overloaded circuits. Plan future expansion by choosing transformers rated higher than total current wattage; for example, pick a 150W transformer if current load is 100W. Use flexible wiring methods, like accessible junctions or conduit, and document locations of all wiring and fixtures during installation. These steps help with systematic repairs, safe upgrades, and long-term system reliability. For precision light cutting, consider shears with high-carbon stainless steel blades for their sharpness and corrosion resistance.
Frequently Asked Questions
How to Arrange Lights in a Garden?
They arrange lights to create pathway illumination, use accent lighting to highlight features, position fixtures to sculpt landscape shadows, integrate safety lighting near steps, and add subtle festive ambiance for gatherings while preserving visual balance and depth.
How to Create a Lighting Layout Plan?
A homeowner used a layered plan: map, zones, and fixture schedule. They chose lighting fixture types, mixed outdoor lighting styles and landscape illumination techniques, prioritized energy efficient options, ambiance creation tips, and safety considerations for balanced coverage.
What Is the Rule of Thumb for Outdoor Lighting?
A sensible rule of thumb: space fixtures 10–20 feet apart, use 6–8 feet for path lights, and mix lighting types for balanced ambient brightness, safety features, energy efficiency, aesthetic appeal, and allow seasonal adjustments.
How to Figure Out Lighting Layout?
Measure, map, and mark: the planner treats the garden like a compass, aligning ambient lighting, path illumination, and focal points. They integrate safety features, energy efficiency, and seasonal changes to balance coverage, spacing, and visual hierarchy.


