As an Amazon Associate, we earn from qualifying purchases. Some links on this site are affiliate links at no extra cost to you. Our recommendations are based on thorough research and editorial judgment.

How to Prune Roses for Maximum Blooms
Use clean bypass shears and gauntlet gloves, sterilized with alcohol or 10% bleach. Prune after last frost, timing by zone: March–April in zones 5–7, May in zones 3–4, January–February in zones 8–10. Remove all leaves, cut out dead or diseased canes, and thin weak growth under 6–8 mm. Cut 45° above outward-facing buds, leave 12–18 inches on hybrid teas, seal little if any, mulch 2–3 inches. Continue for tips on climbers and maintenance.
Key Takeaways
- Prune in late winter/early spring after last frost, timing by zone, to stimulate vigorous bloom-producing growth.
- Remove dead, diseased, and weak canes, cutting above outward-facing buds to encourage open, outward growth.
- Thin the center and cross-branches to improve air circulation and light penetration for more flowers.
- Make clean 45° cuts with sharp bypass shears, cutting to healthy green tissue to promote strong new shoots.
- Feed after pruning with a balanced fertilizer, water deeply, and mulch to support sustained repeated blooming.
What You’ll Need to Get Started
You may be interested


A few basic tools make pruning roses safer and more effective. Bypass shears are essential for pruning, they make clean cuts on stems up to 3/4 inch (19 mm). Gauntlet-style gloves protect the hands and forearms from thorns, often reaching 12–16 inches (30–40 cm). A pruning saw handles canes thicker than 3/4 inch, choose one with a 6–10 inch blade for leverage. Carry eye protection and heavy long sleeves to prevent injuries from thorny hybrid varieties and repeat pruning tasks. Keep cutting tools clean and sterilized with a 10% bleach solution or isopropyl alcohol to avoid disease transfer. Use white glue or horticultural sealant on damaged canes to prevent rot, and a garden waste bag for debris. It is important to choose the right pruning shears based on blade quality and ergonomic design to ensure efficiency and comfort during the task.
Recommended Products

Great garden shears for serious gardeners. This is a heavy, high quality pruning shear you’ll be proud to own or gift. These garden pruners are a classic design and feel expensive. Every gardener needs this pruner, but most gardeners don’t have one.


Precision Plant Care for Professionals and Enthusiasts: These gardening shears are perfect for trimming herbs & flowers; Their compact, fine-tipped, rust-resistant high-carbon steel blades offer precise cutting in tight spaces, making them ideal for daily use in gardens, pots, and on delicate stems; Available in a convenient 12-pack - ideal for florists, landscapers, and nurseries who require multiple shears for continuous, high-volume trimming
When to Prune Roses by Season and Zone

Timing for pruning depends on both the season and the plant hardiness zone. For clear planning, know when to prune roses by zone and follow a simple calendar. Major pruning happens after the last spring frost, usually when new green shoots appear, to remove dead wood and encourage blooms. In Zones 3 and 4, prune in May, waiting for soil and air to warm to avoid frost damage. Zones 5–7 prune in March or April, cutting back to 12–18 inches and opening the center for airflow. Warmer Zones 8–10 may prune as early as January or February to stimulate growth. In fall, trim longer stems after the first killing frost for stability, avoid heavy pruning that would force tender new growth. Ensure you use ergonomic handles on your pruning shears to reduce hand fatigue during extended pruning sessions.
Recommended Products
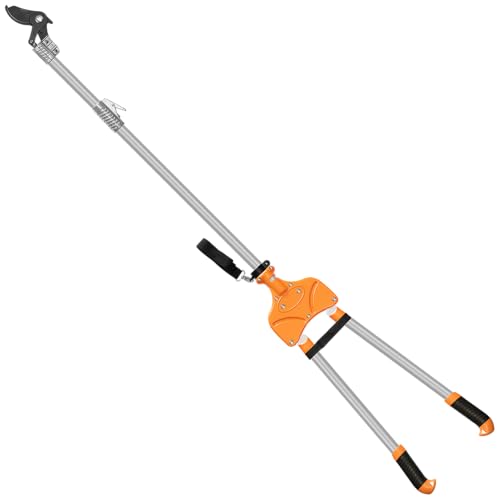
96-INCH TELESCOPIC REACH: Trim branches, suckers, and new growth on tall trees, hedges, and overgrown shrubs, all without a ladder.

Brand name: Zenport

Razor sharp coated carbon steel blade
Quick 30-Second Pruning Summary

When new green shoots appear, prune roses in late winter or early spring before the last frost to promote strong, healthy growth. Cut out dead, damaged, or diseased canes entirely at the base. Cut remaining healthy canes back to 3–5 outward-facing buds, angled at 45 degrees to shed water. For hybrid teas and floribundas, reduce height by one-half to two-thirds to stimulate vigorous new wood and larger blooms on fresh growth. Deadhead spent flowers by cutting back to the next outward bud during the season to prolong flowering. Use clean, sharp bypass pruners and loppers; sterilize between cuts if disease is present. Dispose of removed material away from the bed. Ergonomic design in pruning tools can minimize hand fatigue, making the pruning process more comfortable and efficient. Follow timing and technique consistently for maximum bloom production.
Step 1: Remove Remaining Leaves to Reveal Structure

After cutting back large dead canes and removing weak growth, leaves are cleared to reveal the bush’s framework. The gardener will remove leaves from all stems, exposing nodes and bud eyes for inspection. Clearing old foliage helps prevent disease by removing overwintering spores and hidden pests, improving airflow to about 20–30% more circulation within the canopy. With leaves gone, dead or damaged canes become visible, and crossings or inward-growing branches can be noted for later cuts. This step also makes it easier to locate 1–2 cm swelling buds that will produce next season’s blooms. Use clean gloves and pruners with 2–3 mm sharp blades, place removed leaves in compost or dispose to prevent reinfection, and proceed to planned pruning. For those interested in creating a cozy ambiance in their garden space, incorporating fairy lights with adjustable brightness can complement the serene environment and highlight the beauty of the pruned roses.
Step 2: Cut Out Dead, Damaged, and Diseased Wood

Start by locating canes that show clear signs of decline, such as darkened, shriveled, or brittle stems that no longer have green tissue inside. Inspect each cane carefully. Use clean, sharp bypass shears to make cuts about 1/4 inch above an outward-facing bud, which promotes healthy spring growth. Remove all dead wood completely back to healthy tissue, cutting until white or green wood is revealed. Store shears in a clean, dry environment to reduce contamination and ensure they remain in good working order. Discard removed material properly to prevent disease spread to the garden. Routinely check for damage during the growing season, since timely removal helps maintain vigor. These targeted cuts to prevent further infection and physical failure are straightforward. Follow sanitation and measurement details consistently, and replace or sharpen tools when they dull to guarantee clean, effective cuts.
Step 3: Open the Center for Airflow and Light
With dead and diseased wood removed, attention shifts to opening the bush to improve airflow and light. Create an open center by removing crossing branches that block the interior, cutting to the base or to an outward-facing bud. Aim to keep canes at least pencil-thin, about 6–8 mm diameter, removing anything weaker. Prune canes to a 45-degree angle above outward-facing buds to direct growth outward, promoting light penetration. Good airflow reduces humidity, which helps prevent fungal diseases that thrive in stagnant pockets. After each pruning session, step back and evaluate the center for gaps and light levels. Repeat checks throughout the season, making small corrective cuts as needed to maintain structure and consistent airflow for maximum bloom production. Additionally, consider using ergonomic handles on your pruning tools to reduce fatigue during extended gardening sessions.
Recommended Products

CUTCO Forever Guarantee provides for free sharpening and replacement forever.

[ VERY SHARP & STRONG POWER ] -- The KOMOK professional cordless pruning shears’ blade is forged from SK5 high carbon steel and powered by brushless motor. It is extremely sharp and durable, making it easy to cut 1.65 inch/42 mm branches. Also its service life is 3 to 5 times that of a conventional brush motor. LED digital display shows number of cuts made and current percentage of battery charge. The number of cuts made can be useful to monitor your workload.

8-inch (203mm) cut-n-hold crew landscape and horticulture pruner
Step 4: Remove Thin and Weak Growth
Thin, weak canes smaller than about 6–8 mm in diameter should be removed because they divert energy from stronger stems that support bloom production. Remove thin, weak growth completely to the base or main stem. This redirects carbohydrates and hormones toward vigorous canes that produce more flowers. Use clean bypass pruners sized for one-handed cuts, cutting flush at the base without leaving stubs. Inspect the bush after the initial work, and take out any remaining spindly shoots smaller than a pencil’s diameter. Doing so improves airflow and reduces disease pressure, while encouraging robust cane development over the season. Regular checks every few weeks help maintain vigor and result in a higher bloom count from the stronger, well-positioned canes. To ensure your pruners remain effective, regular maintenance such as sharpening and lubricating the blades is essential for optimal performance.
Step 5: How to Make Proper 45° Cuts Above Buds
Angle the pruner to a clean 45° slope for each cut. Use quality bypass shears to make neat, non-crushing cuts that come to the rescue when healing is needed. Maintain a 45° angle to prevent water pooling on the wound, reducing rot and disease risk. Position the blade about 1/4 inch above an outward-facing bud, which directs new growth away from the plant center for better airflow. Check that the cut slopes down and away from the bud so water sheds off. Consistent 45° cuts also help shape the bush and focus energy on the healthiest buds for maximum blooms over the season. Regularly inspect angle and placement during pruning to optimize flowering and plant health. To ensure safety while pruning, using effective locking mechanisms on your shears can prevent accidental injuries.
Step 6: Sealing Cuts and Preventing Disease
After making neat 45° cuts above outward-facing buds, gardeners should protect the wounds to reduce disease risk. Use sterilized bypass pruners or shears, cleaned with 70% isopropyl alcohol, to guarantee smooth cuts and lower infection chances. Apply a thin layer of wound dressing or white glue within 10 minutes, sealing cuts to block pathogens and insects from entering. Sealant should cover only the exposed cambium, about 1–2 mm thick, avoiding excess that traps moisture. Monitor sealed cuts weekly for blackening, soft rot, or ooze, and remove the dressing if infection appears to allow inspection and re-cutting back to healthy wood. Sterilize tools between plants, and keep records of treatments for consistent preventing disease practices. To effectively remove weeds and roots during this process, consider using tools with serrated stainless steel claws for thorough extraction, which are featured in some of the best root removal tools.
Step 7: Cleanup, Mulch, and Aftercare
Start by removing and disposing of all pruned stems, leaves, and debris to reduce disease pressure. Clean up is essential. Collect and burn or compost debris away from the bed, since infected material can spread fungus. Next, apply a 2–3 inch layer of mulch, such as well-rotted compost or chipped bark, around the base, keeping mulch 1–2 inches from the stems to prevent rot. Fertilize with a balanced 10-10-10 or a rose-specific formula after pruning, following package rates for application. Water deeply, providing one to two inches weekly, more in hot, dry spells. Monitor plants weekly for regrowth, pests, or disease, and adjust watering, feeding, or sanitation practices accordingly to support strong, repeat blooms. Consider using a digital timer to automate irrigation schedules, ensuring consistent watering for optimal rose health.
Pruning Special Cases: Climbers, Knock Outs, and Old Garden Roses
Because climbing roses need structure to bloom well, training and selective cutting matter. Climbing roses require canes trained horizontally to encourage flowering, with laterals reduced to 3–6 inches to form a strong framework and abundant blooms. Knock Out roses tolerate harder cuts. Prune up to one-third of overall height in spring to stimulate vigorous growth and continuous flowering through summer. Old garden roses demand timing sensitivity. Those that bloom once should be pruned immediately after flowering, minimizing cuts to preserve next season’s health and shape. Repeat-flowering old garden roses can take more severe pruning before bloom to boost growth and floriferousness. Overall, match technique to growth habit, consider winter damage first, and adjust cuts by variety for best results.
Recommended Products

【2-in-1 Versatility】From ground-level pruning to tall tree trimming, Prunarbo’s battery pruning shears with pole does it all. Attach the extendable pole (4.4–8.2 ft) to reach high branches without climbing or straining, and enjoy cleaner, faster cuts with total control.This long reach tree pruner makes heavy-duty gardening safer, easier, and twice as efficient — ideal for anyone who wants pro results with zero hassle

2-in-1 set: battery pruning shears + 2m telescopic handle. The cordless pruning shears with telescopic handle easily reach high branches - perfect for garden, park and fruit plantation. Flexible, wireless, space-saving. No more climbing ladders.

SMOOTH, SWIFT CUTS with non-stick coated blades
Frequently Asked Questions
How Do You Trim Rose Bushes so They Keep Blooming?
She trims rose bushes by deadheading and seasonal pruning; tools needed include sharp secateurs, loppers, gloves. Pruning techniques involve cutting to outward-facing buds, removing weak or crossing canes, and reducing height to encourage re-blooming.
What Happens if I Prune Roses in September?
About 60% of gardeners report increased winter dieback; pruning roses in September can spur tender growth prone to frost. Fall pruning should be minimal, prioritizing rose health by removing dead or diseased wood only, avoiding heavy cuts.
How Do You Get Roses to Bloom Continuously?
Maintain consistent rose care: deadhead spent blooms, feed balanced fertilizer in spring, water one to two inches weekly, prune weak canes and shorten young stems for bushiness, and guarantee six+ hours sunlight to encourage continuous bloom cycles.
Is There a Wrong Way to Prune Roses?
Yes — pruning mistakes can wound roses like a blunt blade; improper timing, over-pruning, failing to remove diseased canes, or incorrect angled cuts harm rose care, reducing blooms and increasing disease risk, stressing the plant unnecessarily.


