As an Amazon Associate, we earn from qualifying purchases. Some links on this site are affiliate links at no extra cost to you. Our recommendations are based on thorough research and editorial judgment.

Weeding Between Pavers and Hardscapes: Special Techniques
Weeds thrive in warm, humid climates where 2–10 mm paver joints collect seed and silt. Use a stiff-bristle broom weekly, pressure wash at 1,200–2,000 psi to remove seedlings, and extract roots with a weed fork or screwdriver for taprooted plants. For persistent grasses, apply sethoxydim; for broad-spectrum control use glyphosate cautiously, on calm dry days with gloves and eye protection. Refill joints with polymeric sand, compact and mist to harden, and continue maintenance for lasting results, more practical tips follow.
Key Takeaways
- Sweep weekly with a stiff-bristle broom to remove seeds and debris before they germinate.
- Pull young weeds by hand or use a weed fork, removing roots to prevent regrowth.
- Refill joints with polymeric or kiln-dried sand and mist to lock and resist weed establishment.
- Use targeted heat (propane wand) or boiling water for spot treatment of small annuals, practicing safety precautions.
- Install a compacted aggregate base and landscape fabric under pavers during installation to reduce future weed invasion.
Why Weeds Thrive Between Pavers in Warm, Humid Climates
You may be interested


Why do weeds so readily appear between pavers in warm, humid climates? Moisture and heat combine to speed seed germination, creating ideal conditions for weeds. Small gaps of 2–10 mm between pavers collect soil and decaying leaves, offering a thin but fertile substrate. Wind and rain transport seed and silt, depositing them into joints where they can sprout. Common species like crabgrass, spurge, and sedge tolerate heat and establish quickly, often rooting 5–10 cm deep into compacted joint material. A paver patio with poorly compacted sand or polymeric sand is especially vulnerable, as water retention promotes growth. Regular inspection every 4–6 weeks during the growing season helps detect early sprouts. Prompt removal prevents deep root systems from forming and reduces maintenance time. Utilizing rust-resistant finishes on tools can also aid in the maintenance of pavers by ensuring durability and performance in humid conditions.
Best Tools and Safety Gear for Tackling Paver Weeds

A few reliable tools make tackling weeds between pavers far more manageable. A stiff-bristle broom is essential for weekly sweeping, removing debris and preventing weed seed accumulation in joints. A pressure washer (1,200–2,000 psi) comes next, cleaning surfaces and blasting out small seedlings, it makes maintenance easier. Hand tools like a weed fork or a flat-blade screwdriver work for extracting taprooted weeds, aim to remove at least 1–2 inches of root. For chemical approaches, gloves (nitrile or heavy-duty) and sealed eye protection are required to prevent exposure. When using flame weeders or boiling water, wear closed-toe shoes and long pants to avoid burns. Consider using battery-powered shears for effortless trimming of overgrown plants around pavers, which can reduce physical strain and increase efficiency. These best tools and safety gear together address common weed problems methodically and safely.
Recommended Products

Industrial Performance: Easy-to-start with its CRX 420 direct drive engine, this hot-water gas powered pressure washer is perfectly suited to power wash the toughest grease and oil stains from industrial equipment, factory floors, and fleet vehicles

PUMPS: Commercial Duty Triplex, Plunger Pumps, Oil Bath Crankcase, Stainless Valves, Brass Manifold, Direct Drive, Thermo Pump Protector

SIMPSON PRESSURE WASHER FOR PROFESSIONALS: The Simpson Aluminum Series gas power washer cleans decks, driveways, siding, fencing, equipment, and graffiti; The cold water machine is great for contractors; 49-State Compliant (Not for sale in California)
Manual Removal Techniques That Actually Work

Start by inspecting joints when weeds are still young and small, since early action prevents deep root establishment and makes removal simpler. Manual removal works best at this stage, hand pulling complete roots stops regrowth. Use a weed fork or flat-blade screwdriver, 6–8 inch shaft, to lever roots from 1–2 inch deep joints without chipping pavers. Regular inspections every 7–14 days catch new shoots early, reducing long-term weed growth and labor. Pressure washing at 1,200–2,000 psi can loosen stubborn roots and debris, then hand-extract residue. After removal, refill joints with polymeric sand or kiln-dried sand, compacting to within 1/8 inch of the surface to stabilize joints and deter future weeds. Consider blades that cut roots and trim branches for enhanced versatility in managing different types of weed growth. Work methodically, section by section, for best results.
Using Heat: Flame Weeders and Safe Practices

Flame weeding offers a fast, non-chemical option for killing weeds between pavers and in gravel, using a propane torch to apply intense heat that ruptures plant cell walls and causes rapid desiccation. Flame weeders use a handheld propane wand, typically producing 1,000–2,500°F (540–1,370°C) at the tip, and they deliver effective desiccation on contact for small annuals. Tough perennials may need two to three passes spaced 7–14 days apart, because roots can resprout if not fully damaged. Safety precautions are essential: wear long pants, closed-toe boots, heat-resistant gloves, and keep a 10–15 ft cleared perimeter free of debris. Do not operate in wind above 10 mph. Maintain a 20 lb propane cylinder upright, check hoses for leaks, and store fuel safely. Consider using high-temperature resistance aluminum foil tapes for potential sealing needs in high-heat applications.
Recommended Products
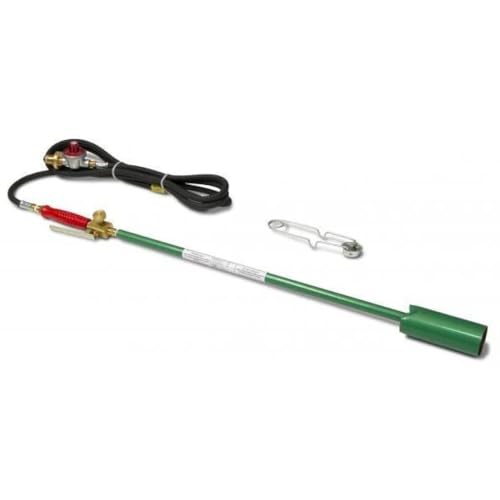
Spot Weeding Made Easy: Includes squeeze valve with adjustable pilot for precise flame control during targeted weed removal

High-Intensity Heat for Quick Weed Eradication - This heavy-duty weed torch delivers an impressive maximum heat output and reaches a scorching 4000°F. Its intense flame rapidly wipes out even the most stubborn weeds, greatly boosting work efficiency for home gardens and farms while cutting down on time and effort.

POWERFUL PROPANE WEED TORCH FOR OUTDOOR USE – Designed for yard, garden, driveway, sidewalk, gravel path, and patio maintenance, this propane weed torch helps burn unwanted weeds quickly without bending or pulling by hand.
Boiling Water and Other Nonchemical Killers

Boiling water can be poured directly onto weeds to scald leaves and roots, reaching growing points and killing small annuals on contact. It is a nonchemical option suitable for joints between pavers and cracks in hardscapes, effective on small, isolated weeds when applied carefully. Use water at 100°C (212°F), poured from a kettle or pot, avoiding desired plants within 10–15 cm to prevent collateral damage. Repeat treatments every 7–14 days for persistent perennials, until rhizomes are exhausted. Other natural weed killers exist, like concentrated acetic solutions, but require caution and legal awareness. These methods come to the rescue when chemical use is undesired, and careful technique helps prevent weed growth while preserving surrounding landscape materials. Some energy-efficient grow lights, such as those from Barrina, can also aid in indoor plant maintenance by promoting healthy growth while reducing costs.
DIY and Natural Weedkillers: Vinegar, Salt, and More
When chemical herbicides are unwanted, several DIY remedies come to the rescue for treating weeds between pavers and on hardscapes. Mix equal parts horticultural vinegar (20–30%) and water, add one teaspoon dish soap per quart to improve leaf adhesion, then apply to foliage on a dry, sunny day. Boiling water is simple and instant; pour carefully onto individual weeds to scald roots and crowns. For stubborn patches, combine vinegar, one cup salt per gallon of solution, and soap, apply directly and avoid runoff to soil and nearby plants. Salt acts as a natural herbicide by drawing moisture from tissues, but it can harm soil structure. Repeat treatments may be required, monitor regrowth, and reapply as needed for control. Safety features like quick-release mechanisms are important to consider when working around children and pets, ensuring safer gardening practices.
Recommended Products

6x more powerful than regular household vinegar

Acid-resistant: equipped with acid-resistant EPDM seals and a plastic spray wand and nozzle, the sprayer is suitable for applying acidic crop protection products

✔️ PET & KID SAFE HERBICIDE - Eco Garden Pro Weed Killer is designed with you and your family in mind! All of our ingredients are carefully selected to be SAFE FOR: PETS, CHILDREN, BEES, FISH, AND ANY LIVESTOCK!
Polymeric Sand and Joint Stabilizers: How They Prevent Regrowth
Apply polymeric sand to paver joints to create a hardened barrier against weeds. Sweep 1/8 to 3/8 inch of sand into joints, compacting with a plate compactor or rubber mallet, then mist to activate binders and cure for 24–48 hours. This polymeric sand, containing polymer binders, hardens with moisture yet remains slightly flexible to resist cracking. It prevents weed growth by sealing seed contact with soil and reducing germination moisture. Joint stabilizers also lock pavers, limiting movement that opens gaps for weeds. Reapply every 2–4 years, depending on foot traffic and climate, as part of preventive maintenance. Use polymeric sand specified for joint widths 1/8–1 inch and follow manufacturer dilution and sweeping instructions precisely. For those seeking decorative solutions, consider using battery-operated fairy lights to enhance the ambiance of hardscape areas while maintaining energy efficiency.
When and How to Use Commercial Herbicides on Hardscapes
Although chemical control is often reserved for large or persistent infestations, commercial herbicides can come to the rescue for stubborn weeds growing between pavers and other hardscapes. Use herbicides labeled for hardscapes to prevent damage to paver surfaces and adjacent plants. Read and follow manufacturer directions, including dilution ratios such as 1–2% solution or 10–20 mL per liter where specified, and observe re-entry times, typically 4–24 hours. Match product type to weeds: glyphosate for broad-spectrum, sethoxydim for grasses, or selective broadleaf formulas for dicots. Test a small, hidden area first to check staining. Apply on dry, calm days, avoiding runoff; use a hand sprayer with a 0.5–1.5 gpm nozzle for controlled coverage and effective control. Using battery-operated fairy lights with a timer function can help create an ambient atmosphere during outdoor maintenance activities.
Installation and Maintenance Practices to Keep Weeds Out
Good installation and steady upkeep make the difference between a tidy patio and one overrun by weeds. Begin with proper installation: lay a weed barrier fabric (6–8 oz per square yard) beneath pavers to block seed contact with soil and aid drainage. Use a compacted 4–6 inch aggregate base for stability. Fill joints with polymeric sand, sweeping in 1/8–3/8 inch joint depths, then mist to harden; this creates a durable, weed-resistant seal. Seal pavers every 2–3 years with a penetrating sealer to fill microgaps and repel moss. Sweep weekly with a stiff-bristle broom to remove debris and seeds. Regular weeding is crucial to prevent dandelions from returning, as mentioned in the usage guidelines for dandelion weeders. Inspect quarterly for cracks or settled joints, repair promptly with sand or patching compound, maintaining a consistently weed-free hardscape.
Planting and Design Strategies to Soften Hardscapes Without Encouraging Weeds
After proper installation and routine maintenance have minimized weed entry points, thoughtful planting and design can soften hardscape edges without inviting more weeds. Use ground cover plants like Blue Daze or Mexican Heather to limit bare soil, spacing them 12–18 inches apart for quick closure. Create curved planting beds with 18–24 inch radii to break straight lines and allow natural plant groupings that suppress weed seedlings. Choose drought-tolerant, low-growing species such as Foxtail Fern and African Iris to reduce watering and maintenance needs. Maintain a 2–4 inch mulch layer of organic mulch around plants to retain moisture and block weeds, keeping mulch 1–2 inches from hardscape surfaces. Leave a 4–6 inch gap between perennials and hot pavement for plant health and easy access. Consider installing durable stainless steel D-rings for securing shade sails, which can enhance both aesthetics and functionality in outdoor spaces.
Frequently Asked Questions
How to Pull Weeds From Between Pavers?
First, pull weeds by loosening soil with a fork or screwdriver, gripping at the base to extract roots. He uses weeding techniques, natural remedies, and landscaping tips, then refills joints with sand to prevent regrowth.
What Is the Best Tool for Weeding Between Pavers?
A hand weeder ranks as the best weeding tool for between pavers; it exemplifies manual vs. mechanical choices, offering precise root removal. Ergonomic tool features like cushioned grips and angled shafts reduce strain and improve control.
What Can You Put Between Pavers to Stop Weeds?
They recommend polymeric or joint-stabilizing sand, landscaping fabrics beneath pavers, and regular preventive measures like sweeping; natural remedies (vinegar, boiling water) address existing weeds but won’t replace proper joint sealing.
How to Seal Pavers to Prevent Weeds?
A homeowner sealed driveway pavers with polymeric sand and a penetrating acrylic sealer. He followed paver sealing methods, chose best sealant types (acrylic and polyurethanes) and applied maintenance tips like resealing every 2–3 years.


