As an Amazon Associate, we earn from qualifying purchases. Some links on this site are affiliate links at no extra cost to you. Our recommendations are based on thorough research and editorial judgment.

Natural Edge Maintenance: Working With Your Lawn’s Growth Patterns
Natural edge maintenance defines turf borders to prevent grass invading beds and paths. Regular observation matters: check growth monthly, note fast spring shoots needing edging every 2–4 weeks, slower lawns every 6–8 weeks. Use a manual edger or spade for curves, electric or gas models for larger areas, and a string trimmer for cleanup. Apply 2–4 inches of mulch, add ½ inch compost yearly, aerate compacted zones, and follow a seasonal calendar for consistent results if the guide continues it will explain specifics.
Key Takeaways
- Observe seasonal growth and edge every 2–4 weeks in spring/early summer, adjusting frequency for rainfall and fertilization.
- Map problem areas, measure encroachment over 2 inches, and mark desired edge lines with string or hose.
- Use the right tool: manual edger for curves, electric for medium yards, gas for large or compacted soil.
- Maintain edges with 2–4 inches of mulch, annual ½-inch compost, and deep, infrequent watering (~1″ weekly).
- Record dates and actions, test soil every 2–3 years, and schedule spring/fall edging and a late-summer touch-up.
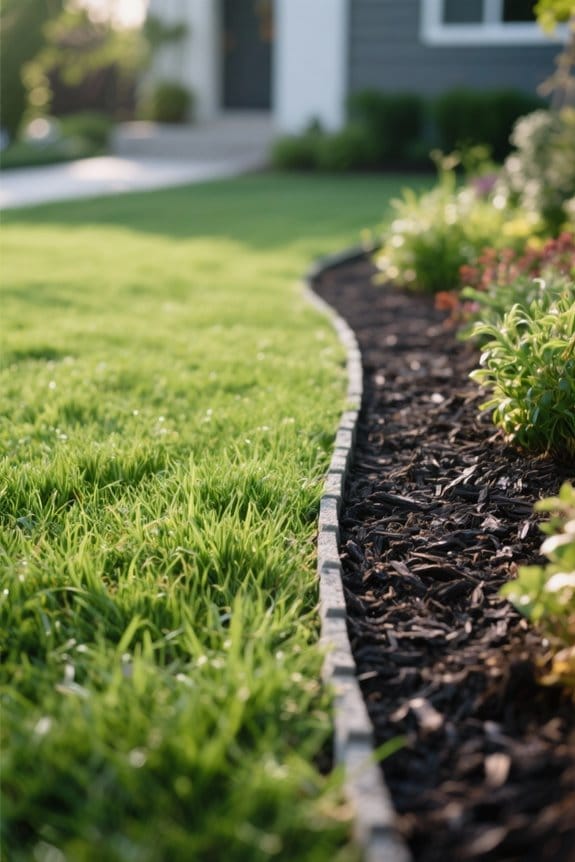
Why Natural Edge Maintenance Matters for Your Lawn
You may be interested


Because well-defined borders control interactions between turf and planting areas, natural edge maintenance matters for both function and form. It prevents grass growth from invading beds, keeping plants healthy and reducing competition for water and nutrients. Regular edging creates defined borders about 2–4 inches deep, forming a clear visual line that improves curb appeal and gives a professional look. Natural edge maintenance also supports soil health by minimizing disturbance and avoiding herbicides, which can harm beneficial organisms. Inspect edges every 2–6 weeks depending on growth rate, and trim with a half-inch precision tool or spade for consistency. A healthy lawn benefits from these practices, which promote airflow and moisture distribution, reduce mowing stress, and help the landscape come to the rescue when problems appear. Ergonomic handle designs on pruning shears can help reduce user fatigue during prolonged edging sessions, making the maintenance process more efficient and comfortable.
Observing Seasonal Growth Patterns Before You Edge
Natural edge upkeep leads naturally to watching how the lawn grows through the year. Observe seasonal growth patterns monthly, noting grass growth height and density with a 1-inch ruler and simple grid. Spring and early summer show accelerated growth; edge every 2–4 weeks then, depending on vigor. Monitor rainfall and temperature; wet, warm stretches push grass upward faster, requiring closer mowing and edging. Cool-season grasses peak in spring and fall, so plan edging during those growth spurts, perhaps every 3 weeks when height exceeds 3 inches. Clear fallen leaves before trimming for visibility. Record dates and actions in a log for predictable lawn maintenance. This systematic approach helps maintain crisp edges, prevents overgrowth, and optimizes edging timing. For those using electric and cordless edgers, consider the runtime limitations based on battery life and make necessary adjustments to your maintenance schedule.
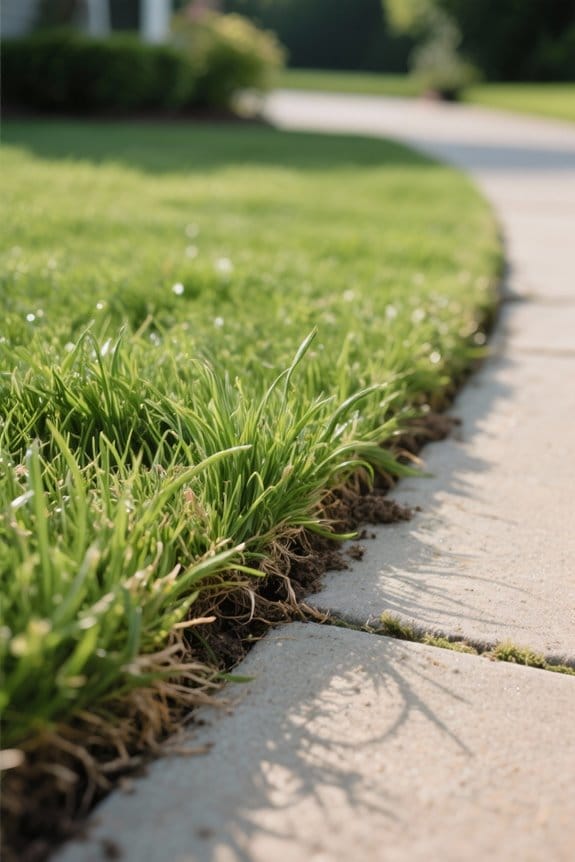
Assessing and Mapping Your Lawn’s Existing Borders

When evaluating a lawn’s borders, start by walking the perimeter to see where grass meets paths, beds, and driveways. Assess each junction in detail, noting overlaps and gaps in a sketch or photo map to define problem sections. Use string or a garden hose to mark a smooth desired edge line, keeping curves at a 12–24 inch radius where gentle flow is wanted. Measure encroachment widths with a tape; record areas over 2 inches for immediate trimming. Inspect for foot traffic compaction and erosion, estimate soil loss in linear feet, and clear debris like leaves and sticks to expose true edges. Map garden beds separately, label materials, and outline priorities before beginning the edging process. Consider incorporating weather-resistant features to ensure durability and longevity of garden borders exposed to outdoor elements.
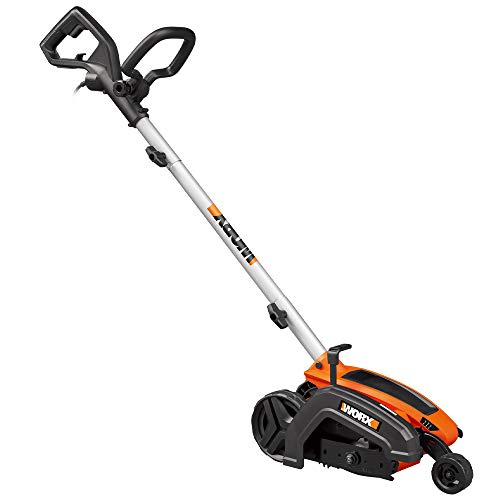
Choosing the Right Edging Method for Different Areas
Selecting the right edging method depends on yard size, soil type, and the desired look. Manual edgers suit small, detailed areas like flowerbeds, providing precise control for 2–4 inch deep cuts and curved shapes. Electric lawn edgers fit medium yards, offering 1,200–1,800 W motors that balance power and convenience for 3–5 inch trenches. Gas-powered edgers come to the rescue on large properties or compacted clay, producing 3–7 hp and deeper cuts up to 6 inches for heavy-duty lawn care tasks. Plastic edging is flexible and cost-effective for DIY curves, typically 4–6 inches tall, installed with stakes every 12–18 inches. Stone edging gives a durable, aesthetic border, set on compacted gravel and mortar, aligned to prevent shifting. When choosing a lawn edger, consider blade types and materials, such as carbon steel or carbide, for enhanced durability and efficiency in cutting through dense turf and roots.
Recommended Products

Husqvarna 525ECS gas edger is a lawn care equipment tool that is ideal for professional turf maintenance work

POWERSTATE Brushless motor provides more power and faster edging than 31cc gas Lightweight and balanced design reduces fatigue Fully compatible with 275+ Milwaukee M18 Solutions

HIGH VERSATILITY AND PRODUCTIVITY: DEWALT Universal Attachment capability to accept additional tool pieces
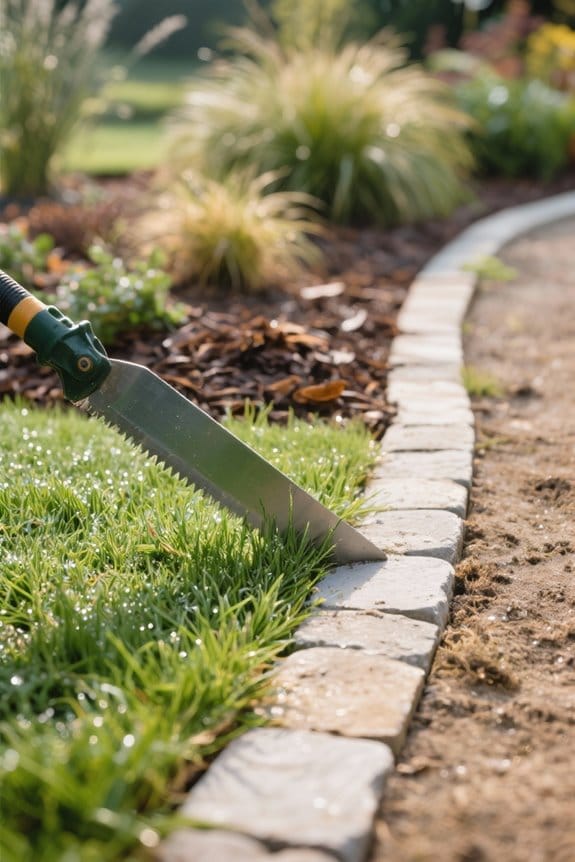
Tools and Equipment for Natural Edge Maintenance

Begin by gathering a small set of reliable tools tailored to the site and soil. A manual edger offers precision cutting, with a 6–8 inch blade recommended for tight curves and firm soil, and comes to the rescue where power tools would damage roots. A string trimmer cleans thick grass near the lawn’s edge, use 0.080–0.095 inch line for residential turf. Garden shears trim overgrowth, select bypass blades for clean cuts and 8–12 inch blade length. Include a spade for shaping borders, 6–8 inch wide head works well. Keep a rake to remove clippings and debris. Use landscape fabric and 2–3 inch mulch layering to suppress weeds and retain moisture. Maintain tools by sharpening blades and cleaning after each use. For outdoor enthusiasts seeking shade solutions, consider using stainless steel or aluminum alloy poles for their durability and rust resistance, ideal for long-lasting outdoor setups.
Recommended Products
POWER LIKE THE PROS: The 12 Amp motor spins the 7.5” blade fast and deep at 4700 revolutions per minute, giving you professional-looking lines and edges.

Versatile Edging Performance: The grass edger is ideal for creating sharp borders along driveways, sidewalks, patios, and hardscapes

Preparing the Lawn: Timing, Marking, and Soil Prep
Because spring signals the start of active grass growth, preparations should begin as turf comes out of dormancy. Begin by preparing the lawn systematically, clearing leaves and sticks so edges are visible and tools work well. Next, marking defines the shape; use marking paint or string, creating smooth curves about 2–4 inches beyond desired final edge to allow trimming tolerance. Mow the lawn to normal height first, typically 2.5–3.5 inches, which makes the edge line clear for precise work. For soil prep lightly water the strip to 1⁄2 inch depth, softening soil without making it muddy; this comes to the rescue when cutting roots or reshaping. Finally, inspect for buried debris and adjust markings before beginning edging operations. Consider using manual edgers for small to medium-sized tasks, as they offer greater control and precision without the need for electricity or batteries.
Step-by-Step Natural Edging Techniques for Clean Lines
Cut a clear guide line using marking paint or a taut string placed 2–4 inches beyond the desired finished edge. A manual or electric edger comes next, used at a vertical 90-degree angle to slice turf cleanly along the line. Work in 3–4 foot sections for control, striking roots and sod to form a sharp profile. Remove loose soil and grass clippings after each pass to prevent smearing and improve airflow. Fill any gaps with soil or mulch to stabilize the edge and discourage encroachment. Mow adjacent lawn to the recommended height before edging for visibility. Repeat edging every two weeks during peak growth, when turf expands rapidly, to maintain consistent clean lines and prevent grass from invading beds. Consider using a BLACK+DECKER Edger & Trencher for versatile yard tasks, as it effectively combines edging and trenching functionalities.
Installing and Integrating Landscape Edging Materials
Once edges are cleanly cut, the next step is to install a permanent barrier that holds that profile. Installing landscape edging begins by choosing material: 4–6 mm metal for thin profiles, 2–3 cm plastic for flexibility, or 5–10 cm treated wood for rustic looks. Place the edging along marked lines where grass meets flower beds or pathways, dig a 5–10 cm trench, and set the edge so the top sits flush with turf. For stone or brick, use a compacted 10 cm gravel base and mortar or polymeric sand for stability and drainage. Secure with spikes or backfill soil to prevent shifting. Regular inspections prevent grass encroachment, reinforce loose sections, replenish mulch, and aid maintaining clear, durable borders that enhance visual appeal. Ergonomic designs in edgers enhance comfort and reduce strain during installation, making the task more manageable and efficient.
Adjusting Edging Frequency Based on Grass Growth Rates
Monitor edging frequency based on how quickly the turf grows, adjusting the schedule to maintain crisp boundaries without overworking tools. Fast-growing grass may need edging every two weeks during peak spring and summer, preventing encroachment into beds and paths. Slower varieties can be edged every 6–8 weeks, keeping the lawn looking great with less effort. Align edging frequency with mowing by edging every second or third mow, which limits wear on metal blades and powered edgers. Regular observation of growth rates after fertilization or heavy irrigation is essential, as rapid spurts may require extra sessions. Use a 2–3 inch cut depth for clean soil lines, and measure progress with simple markings to track maintaining sharp boundaries. Additionally, consider implementing pergola shade sails in outdoor spaces to protect against UV rays and enhance the longevity of your lawn’s borders.
Dealing With Common Edge Problems: Compaction, Weeds, and Thatch
Several common problems can undermine a crisp lawn edge if they are not addressed promptly. Compaction reduces pore space in soil, blocking water and root growth; aerate edges with a 3–4 inch core aerator every 1–2 years to relieve pressure. Weeds invade borders when disturbed soil and mulch gaps exist; remove them by hand or spot-treat with herbicide, and consider 2–3 inches of mulch or landscape fabric to come to the rescue. Thatch, a 0.5–1 inch layer of dead material, blocks light and moisture; dethatch with a rake or vertical mower in spring or early fall to restore healthy growth. Monitor fast growth rate grasses more often, inspect monthly, and address issues promptly for tidy, resilient lawn edges. Selecting the right grow light for indoor gardening requires careful consideration of features, energy efficiency, installation flexibility, coverage area, and durability.
Recommended Products

AERATOR IMPROVES LAWN HEALTH: This 3 FT Drum Spike Aerator features 3" long spikes that penetrate up to 2.5" deep to allow for better water absorption, seed germination, and drainage.

Promote Grass Growth: Ensure your lawn always gets their nutrients with this lawn aerator that penetrates the ground they’re planted on all the way down to their root system

Aerate & Relieve Compacted Soil: 32 heat-treated, 16-gauge Steel plugging spoons penetrate compacted soil and remove up to 3-inch plugs of soil, allowing water, seed, and fertilizer to reach the roots. Brinly plug design is narrower with sharpened ends to allow easier penetration and require less weight.
Long-Term Care: Mulch, Soil Health, and Watering Practices
Because long-term care ties together mulch, soil health, and watering, a simple routine prevents many problems before they start. Apply 2–4 inches of organic mulch to beds; it suppresses weeds, retains moisture, and regulates soil temperature for root protection. Add compost at 1/2 inch annually to supply organic matter and improve soil structure, creating an ideal growing environment that supports deep roots. Use a watering routine of deep, infrequent sessions, delivering about 1 inch of water per week to encourage roots to reach 6–12 inches. Test soil every 2–3 years to detect nutrient deficiencies and pH issues, then apply targeted amendments such as lime or balanced fertilizer based on results. These steps create resilience with measurable, low-effort maintenance.
Seasonal Maintenance Calendar for Year-Round Edges
Long-term care practices like mulching and seasonal watering set the stage for tidy edges year-round. Spring: as the lawn grows actively, the need to edge appears; edge every two weeks to define boundaries and prevent spread into beds. Mid-summer: continue regular mowing and edge every 2–4 weeks, keeping borders crisp amid peak growth and reducing disease risk. Late summer: perform a final touch-up in August or September to prepare edges before dormancy begins. Autumn: edge once to maintain clean edges and minimize winter moisture problems, trimming to a 1–2 inch profile where appropriate. Winter: inspect for erosion or shifting, record changes, and plan to re-establish precise edges in early spring when growth resumes.
Frequently Asked Questions
What Is the 1/3 Rule for Lawns?
The 1/3 rule for lawns advises removing no more than one-third of lawn height per mow. It guides mowing frequency, respects grass types and seasonal growth, supports lawn health, and informs cutting techniques for resilience.
What Is the 150 Rule for Lawns?
Like a metronome, the 150 rule overview recommends mowing when grass reaches about one-third above ideal height; it aligns with lawn growth patterns, ideal mowing heights, seasonal lawn care, grass type considerations, and key lawn health indicators.
How to Maintain Lawn Edging?
Maintain lawn edging by using proper lawn tools and edging techniques, adjusting trimming strategies for grass types and seasonal maintenance, monitoring soil health, edging regularly during growth spurts, and scheduling routine checks to prevent encroachment and weeds.
What Are Common Mistakes When Edging?
Common mistakes include poor marking and rushing edging techniques, using wrong common tools, skipping debris or blade maintenance, over edging mistakes that harm aesthetic balance, ignoring seasonal considerations, and generally undermining lawn care effectiveness.