As an Amazon Associate, we earn from qualifying purchases. Some links on this site are affiliate links at no extra cost to you. Our recommendations are based on thorough research and editorial judgment.

How to Measure Your Space for Optimal Shade Coverage
Measure sun paths to find peak exposure between 10 a.m. and 4 p.m. Short: mark playgrounds, patios, and dining spots needing shade. Medium: identify structurally sound anchor points like posts, walls, or trees, record clear spans in feet or meters, and take three measurements for triangular sails. Short: add 10–15% extra length for tensioning hardware. Medium: allow an 18–20° slope (about 3 ft drop per 10 ft span) for drainage and note fabric GSM and UV block. Continue for installation tips and specs.
Key Takeaways
- Trace the sun path and mark peak exposure times (10 a.m.–4 p.m.) to identify where shade is most needed.
- Measure clear spans between proposed anchor points and record three spans for triangular sails or all edges for custom shapes.
- Add 10–15% to measured lengths to allow for tensioning hardware, overlaps, and seam allowances.
- Measure vertical heights and slope between anchors, targeting an 18–20° slope (≈3 ft drop per 10 ft) for drainage.
- Inspect and record structural capacity of posts, walls, or trees and note required post depths (36–48 in) and load ratings.
Choosing the Best Location for Your Shade Structure
You may be interested


When choosing the best location for a shade structure, first trace the sun’s path across the site to pinpoint peak exposure between 10 a.m. and 4 p.m. Identify areas needing ideal shade coverage, such as playgrounds or dining spots, and note nearby existing structures that could cast shadow or block wind. Measure the distance from walls, posts, or trees to determine required sail sizes; typical panels span 8–20 feet, so measure to the nearest inch. Check anchor points for suitability, looking for solid masonry, treated posts, or engineered tree protection. Consider weather patterns, including prevailing wind speeds and local rainfall, to choose durable fabrics and reinforced fittings. Plan layout in the outdoor space to balance shade, circulation, and safety. When planning for outdoor lighting alongside your shade structure, consider using battery fairy lights with remote controls for convenient ambiance and versatile placement.
Recommended Products

Durable & Heavy-Duty Material: Crafted from 120GSM high-density polyethylene (HDPE) with reinforced binding and grommets, this sun shade cloth offers exceptional durability for outdoor use. Its permeable design allows rainwater to pass through easily, preventing water accumulation and sagging. Resistant to tearing and mild weather, it provides reliable sun shade and light wind protection season after season

Super Heavy-Duty Commercial Grade Design: Crafted from 280GSM extra-heavy-duty permeable fabric and reinforced with stainless steel mounting rings. The patented Artpuch design integrates steel cables into the edges, directing all pulling tension to the cables—enhancing both durability and appearance for commercial and residential use.

★ U-SHAPED DESIGN: With unique U-shaped design, it can be easily pull back when you don’t need the shade. You can determine the distance between the sections with control tape and close it when not in use. It is also a stylish decoration for your patio or pergola.
Identifying and Marking Anchor Points

After selecting the site and sketching sun paths, the next step is to identify and mark solid anchor points for the shade sail. Inspect posts, walls, or trees that can mount hardware, verify structural soundness and resistance to wind loads. Mark each anchor point clearly on the sketch to visualize layout and shade coverage. Measure vertical heights and note any slopes to ascertain correct sail tension and drainage. Use a measuring tape to record distances and heights, write values in feet or meters, and include expected load ratings for mounts, typically 1,000–2,000 pounds for permanent installations. For trees, select trunks at least 8–12 inches diameter and avoid damage with protective sleeves. Proper marking simplifies ordering and installation, guaranteeing reliable sun protection. Proper installation angles and tension are crucial to prevent sagging and ensure optimal water drainage.
Recommended Products
【𝗛𝗘𝗔𝗩𝗬 𝗗𝗨𝗧𝗬】: our super ring shade sail exact 260 GSM permeable extra fabric, stainless mounting super rings, edges with cable wires built-in, integrate into the mounting rings, all pulling strength goes to the cable wires, making the edges more durable

【𝗣𝗔𝗧𝗘𝗡𝗧 𝗗𝗘𝗦𝗜𝗚𝗡 𝗙𝗢𝗥 𝗠𝗔𝗫𝗠𝗜𝗨𝗠 𝗗𝗨𝗥𝗔𝗕𝗜𝗟𝗜𝗧𝗬】: Crafted from 260 GSM permeable fabric, reinFORced by robust stainless mounting rings, and featuring integrated cable wires along the edges. This design not only enhances the shade sail's appearance but also ensures exceptional durability by directing pulling strength to the cable wires.

【𝗦𝗨𝗣𝗘𝗥 𝗛𝗘𝗔𝗩𝗬 𝗗𝗨𝗧𝗬 𝗡𝗘𝗪 𝗣𝗥𝗢 𝗥𝗜𝗡𝗚】: Crafted from 260 GSM permeable heavy-duty fabric, featuring upgraded 2025 stainless steel mounting rings and integrated heavy-duty steel cables along the edges. This design channels all pulling forces through the steel cables, enhancing edge durability and improving the overall aesthetics of the shade sail
Measuring Distances Between Mounting Points

Begin by measuring the clear span between anchor points with a tape measure, taking the length from the inside edge of one mount to the inside edge of the next. Measure each side for a triangle shade sail, recording three separate spans to guarantee the right fit and even coverage. Add 10–15% to each recorded length to accommodate tensioning hardware and turnbuckles, this provides slack for adjustments. Take measurements at multiple heights to detect variations in terrain, which can influence final mounting distances under varying weather conditions. Double-check every distance twice for accuracy, incorrect spans cause poor tension or sagging. Use metric or imperial consistently, noting exact numbers like 3.6 m, 12 ft, or 4.2 m after allowance. Using durable construction materials for shade sail poles ensures long-lasting performance and reliability.
Recommended Products

【𝗦𝗨𝗣𝗘𝗥 𝗛𝗘𝗔𝗩𝗬 𝗗𝗨𝗧𝗬 𝗡𝗘𝗪 𝗣𝗥𝗢 𝗥𝗜𝗡𝗚】: Crafted from 260 GSM permeable heavy-duty fabric, featuring upgraded 2025 stainless steel mounting rings and integrated heavy-duty steel cables along the edges. This design channels all pulling forces through the steel cables, enhancing edge durability and improving the overall aesthetics of the shade sail

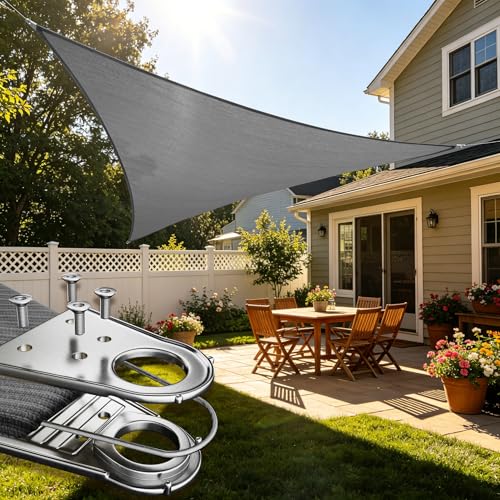
Simple Installation: Experience quick and simple installation with our straightforward 4-step process. Designed for user convenience, the lightweight construction at 32 lbs enables easy setup by a single person. Please see the user's manual and instructional video guide for detailed guidance if needed.

Package Include: 1 base plate; 1 reinforced base frame;1 pcs 12FT cables; 4 drilling bolts; 4 securing nuts; 1 pcs 8 ft pole sections, 1 capped 4ft pole section, total length: 12 ft; D-Ring clamp system, and 1 clamp tightening bolt and nut
Accounting for Height, Slope, and Drainage

A simple rule of thumb helps set mounting heights for reliable drainage and durable shade. Use an 18–20° slope, which equates to about a 3 ft drop per 10 ft horizontal span, to promote runoff and avoid water pooling. Measure height differences between anchor points precisely, and adjust measurements so the lowest point allows consistent drainage. Consider local weather conditions; heavier rainfall may require a steeper slope to protect shade structures over time. Proper drainage preserves fabric and hardware, reducing uneven tension and premature wear. Record all measurements, noting span lengths and vertical offsets, then calculate required post or attachment heights. This systematic approach helps installers achieve functional, long-lasting shade while accounting for site-specific variations. To ensure the longevity of your shade sail, it is crucial to focus on proper installation and maintenance, as this will enhance its utility and lifespan.
Allowing Extra Length for Tensioning Hardware

When measuring for a shade sail, installers should add 10–15% extra length to each side to allow for tensioning hardware adjustments. This practice of allowing extra length accounts for turnbuckles, D-rings, and strap stretch, providing room to fine-tune tension. For example, a 12-foot anchor span calls for a sail edge roughly 10.5–11 feet long, which accommodates fittings without causing excess stress. Accurate measurements that include this allowance prevent excess tightness, which can deform fabric or hardware. Installers measure twice, subtract the required 10–15%, then select fittings rated for loads above expected wind and snow. This approach yields a secure installation and avoids sagging or over-tensioning, ensuring ideal shade coverage and long-term structural integrity. Additionally, installing a shade sail with a 20-40 degree slope is recommended to prevent water accumulation and maintain proper tension.
Selecting the Right Fabric and Material Specifications
Because durable materials determine both lifespan and protection, choosing the right shade fabric starts with HDPE (high-density polyethylene), a tightly woven synthetic that comes to the rescue for most outdoor applications. Select a GSM of 300 or higher. This guarantees robustness against wind, rain, and UV degradation over years. HDPE can block up to 97% of UV Rays, providing measurable sun protection for people and surfaces. Choose the right material by specifying fire-retardant and weather-resistant treatments where needed. Darker colors improve UV blockage but affect heat and appearance. When measuring for panels, add edge overlap of 4–6 inches and seam allowances per installer recommendations. Compare fabric certifications, GSM ratings, and UV block percentages before final selection to guarantee ideal, durable Shade. Breathable designs enhance air circulation, preventing heat buildup and ensuring comfort outdoors.
Sketching Your Layout and Recording Measurements
Following fabric selection, the installer moves to sketching the site and plotting anchor points for the shade. Begin by drawing a clear sketch of the area, marking existing posts, walls, and obstacles to visualize placement. Use a measuring tape to record precise measurements between each anchor point, noting distances on the sketch for reference. Take multiple measurements from different angles to confirm consistency, especially for non-linear anchor points that affect sail shape and tension. Add extra space of 10–15% to each recorded distance to allow for tensioning hardware adjustments during installation. Document vertical changes in height or slope at anchor points, since rise and fall alter final tension and attachment hardware specifications. Proper measurement from D-ring to D-ring is crucial to ensure the shade sail is installed correctly. Keep notes organized for easy review during installation.
When to Consult a Professional for Custom Solutions
Who should be called in for a custom shade solution, and why might an expert come to the rescue. A homeowner should choose professional help when the space exceeds 200 square feet, has irregular shapes, or requires permanent anchoring. Experts guarantee precise measurements with laser tools, reducing errors to within 1/4 inch. They assess local weather patterns and sun orientation, recommending cantilevered sails, pergolas, or adjustable louver systems sized to block summer sun at 45 degrees. Professionals also confirm compliance with codes, suggest corrosion-resistant materials like stainless steel or treated wood, and specify post depths (typically 36–48 inches) for wind loads. For true superior shade coverage, opt for custom solutions when safety, durability, or complex aesthetics matter. High-density polyethylene materials, such as those used in many top shade sails, ensure longevity and effective UV protection.
Frequently Asked Questions
How to Properly Measure a Window for Shades?
Measure the window dimensions with measuring tools; mock the chaos of crooked frames. For inside or outside shade types, record narrowest widths and shortest heights, note installation tips to guarantee light control and resolve privacy concerns.
How to Measure Space for Shade Sail?
Measure distances between stable anchor points, noting heights and slopes for water runoff. He applies measurement techniques to determine ideal dimensions, considers material considerations and sunlight exposure, and plans fixing methods for secure, tensioned shade sail installation.
How Much Space Should I Leave on Each Side of the Blinds?
They should leave 1–2 inches per side for inside mount blind fitting; for outside mount, extend 2–3 inches each side. This space allowance balances shade efficiency, room dimensions, window treatments, and interior design.
Is a 4×4 Strong Enough for a Shade Sail?
Yes — a 4×4 can heroically hold a shade sail if properly installed. Heightened attention to shade sail strength, installation techniques, material considerations, load bearing capacity, wind resistance, and ideal anchoring guarantees reliable performance.


