As an Amazon Associate, we earn from qualifying purchases. Some links on this site are affiliate links at no extra cost to you. Our recommendations are based on thorough research and editorial judgment.

Edging Techniques for Different Border Materials
Edging defines beds cleanly and protects plant roots. Use metal set 2–4 inches deep, galvanized or weathering steel to resist rust, stakes every 24 inches. Plastic is pounded into a trench equal to its thickness, overlap or cut 45° for seams. Stone or brick requires a compacted gravel base 2–4 inches deep for stability. Wood benefits from annual sealant and buried 2 inches to reduce rot. Living borders suit low-maintenance zones, keep going for more techniques.
Key Takeaways
- Set metal edging 2–4 inches into soil, level with a string line, and secure with corrosion-resistant stakes for a crisp, durable edge.
- Install plastic edging in a trench matching thickness, tap with a rubber mallet, and overlap or cut 45° joints for seamless runs.
- Lay natural stone or terracotta on compacted sand with slight setback above soil for stability, drainage, and formal symmetry.
- Build wood borders from rot-resistant lumber, seal annually, and set posts deep to prevent shifting and premature decay.
- Use living plant borders or recycled materials with weed barrier and gravel to combine biodiversity, erosion control, and low-cost aesthetics.
Why Proper Edging Transforms Your Landscape
You may be interested


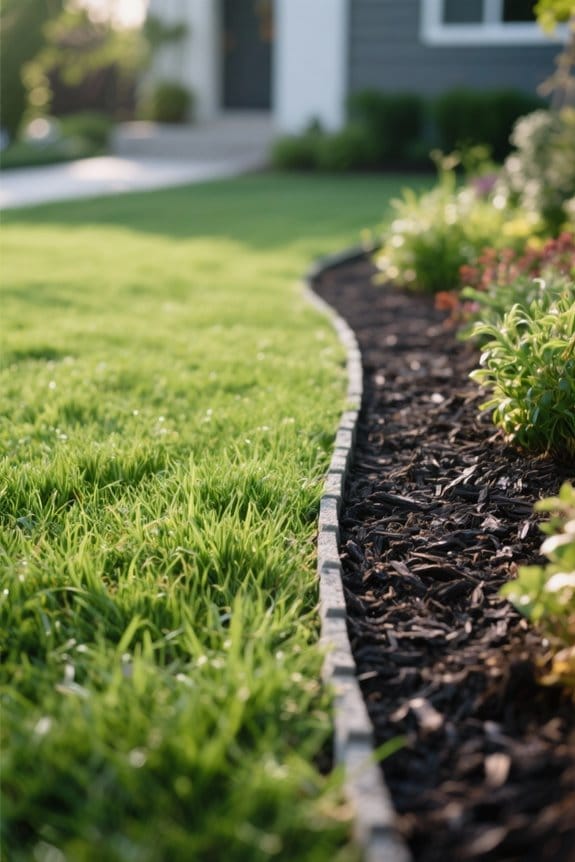
Although edging is often seen as a finishing touch, it plays a practical role in landscape performance. Proper edging creates a defined boundary between garden borders and lawn areas, improving curb appeal and making mowing simpler. Lawn edging, set 2–4 inches deep, keeps turf roots from invading beds and reduces maintenance by cutting weeding time. Edging materials include natural stone, metal, and treated wood, each adding texture and helping to enhance visual appeal. Effective edges retain soil and mulch, reducing erosion and limiting water runoff by roughly 30% on slight slopes. Install pieces every 12–24 inches for stability, or use continuous strips for slick lines. This promotes landscape organization, delineating zones and supporting healthier plant growth when executed correctly. Additionally, choosing high-quality materials like stainless steel ensures the durability and efficiency of your edging tools, making maintenance tasks more manageable.
Choosing the Right Material for Your Garden Style

One practical approach is to match edging material to the garden’s overall style and maintenance needs. Choose natural stone or wood for a cottage garden, using 4–6 inch high stones or 2×4 treated wood sleepers for a rustic, durable edge. For modern yards, plastic or metal edging provides clean 1–2 inch profiles that resist shifting and simplify mowing. Terracotta tiles suit formal beds, set 1 inch above soil to maintain symmetry. Living plant borders, like 6–12 inch dwarf grasses, create a green, biodiverse edge. Recycled materials such as glass bottle necks or upcycled wood come to the rescue for eco-conscious schemes, offering varied colors and textures. Match material thickness, installation depth, and expected maintenance to overall garden style. When selecting a push lawn edger, consider factors such as cutting width and blade type to ensure compatibility with chosen border materials and lawn size.
Recommended Products

Easy installation – Install garden edging border quickly with our patent-pending connection system. Simply hammer spikes to secure for a stable it firmly in place. Ideal for landscape edging border projects.

STAYS IN PLACE - Our edging stays securely in place, keeping mulch and other materials from migrating into other areas of your landscape for a pollished look

Simple installation, no digging required - suitable for all soil types
Metal and Weathering Steel Edging Techniques

Metal edging offers a clean, contemporary border that fits both formal and modern gardens. Metal edging should be set 2–4 inches into the soil, creating clean lines and a 1–2 inch exposed edge for definition, and anchored with spikes every 24–36 inches. Weathering steel, or corten, develops a rust-brown patina that enhances appearance while providing corrosion prevention through a stable surface layer. Installation techniques include leveling panels with a string line and using 4–6 inch galvanized stakes to resist movement. Provide 1–2 inches of gravel or perforated pipe for drainage, to avoid localized wet pockets that impair the patina. Seasonal adjustments and inspections, twice yearly, come to the rescue for long-term durability of landscape edging. Consider using rust-resistant materials for maintaining the longevity and strength of your garden tools, ensuring that they remain effective and durable over time.
Installing Plastic and Pound-In Plastic Edging

After installing rigid materials like corten or steel, simpler solutions are often preferred for informal beds and lawn edges. Prepare a trench slightly deeper than the plastic edging thickness, typically 1.5–2 inches deep and straight along the desired border. Install pound-in plastic edging by placing it in the trench and using a rubber mallet to drive sections into firm soil, working from one end to the other and keeping the top flush with the ground. Energy-efficient LED chips in adjustable grow lights are becoming increasingly popular for their cost-saving benefits and reduced environmental impact. Overlap ends or cut at a 45-degree angle to create a seamless barrier between sections for a tidy finish. Check stability after heavy rains and seasonal freeze-thaw cycles, perform minor adjustment as soil settles, and re-tap loose sections to maintain a clean edge.
Recommended Products

Package Contains: 5000pcs 6 inch landscape fabric staples, these u-shaped garden stakes bulk are rust-proof and anti-rust, can be used for a long time in daily gardening activities.

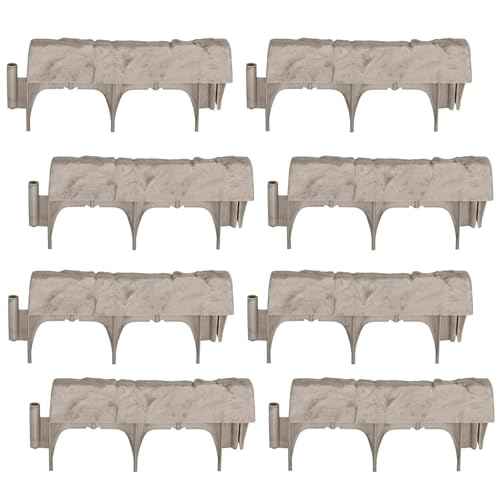
Realistic Rock Appearance: Provides a natural stone look to complement your garden and outdoor spaces.

Effortless Installation – Dig-free installation! Simply align, slide together, and secure with 19.5-inch anchoring spikes. This is perfect for landscape border, garden border edging, and flower bed border, making your project quick and hassle-free.
Stone, Brick, and Concrete Curbing Methods

Select the appropriate material and method before digging begins. Stone edging can be dry-stacked for a rustic look, or mortared for stability depending on slope and use, with stones often 4–8 inches thick. Brick edging requires careful alignment, set on 1–2 inches of compacted sand or in mortar for rigidity, typically using 4-inch-wide modular bricks. Concrete curbing is installed by a machine, laying flexible steel cable within the pour to create a continuous, durable edging that resists cracking. Natural stones and decorative stone define garden boundaries and add texture to landscape design, fitting curves by leveling and shaping each piece. Installation techniques differ: stone for organic shapes, brick for straight formal lines, concrete for long runs needing durable edging. When selecting landscape edging tools, consider ergonomic designs that reduce user fatigue, ensuring comfort and efficiency during installation.
Recommended Products

EASY TO INSTALL: EasyFlex Aluminum No-Dig Edging provides an easy installation for a permanent and maintenance-free edging solution
EASY INSTALLATION: Sections of edging simply slide together and can be tapped with a mallet, which eliminates digging

Do it once, do it Right! Edge Right is the ultimate hammer-in edging. Instead of cheap plastics it's comprised of heavy duty 16-gauge COR-TEN steel.
Wood, Terracotta, and Recycled Rubber Edge Solutions
Stone, brick, and concrete curbing often suit long runs and formal lines, but other materials offer different benefits for smaller beds and informal borders. Wood provides a natural look and customizable heights, for example 4×4 or 2×6 sleepers cut to 6–12 inch border heights, and treated lumber extends durability against rot. Terracotta offers a classic aesthetic and is easy to install with straightforward measurements, for instance 4–6 inch edge tiles set on 1–2 inches of sand. Recycled rubber comes to the rescue as an eco-friendly option that needs no digging, typically 3–4 inch flexible edging strips that resist cracking and require minimal maintenance. Manual lawn edging tools offer durability and ergonomic features, making them suitable for creating these borders effectively. All three define garden borders, enhance visual appeal, and suit varied budgets and climates.
Living Borders: Grass, Shrubs, and Mixed Plant Edging
A living border offers a soft, functional edge that also supports wildlife. Living borders use grass as a flowing edge, trimmed to 2–3 inches for a neat look, and require weekly or biweekly maintenance in growing season. Shrubs add structure; select species 18–36 inches apart for compact varieties, 3–6 feet for larger types, and prune annually. Mixed plant edging combines perennials, ornamental grasses, and small shrubs to create layered height and seasonal color. This approach boosts biodiversity and attracts pollinators like bees and butterflies throughout the year. Choose drought-tolerant, eco-friendly species such as lavender, salvia, and native grasses to conserve water. Plan root barriers or 6–8 inch deep edging to control spread and reduce maintenance. Ergonomic handle designs enhance comfort and reduce hand fatigue when maintaining these living borders, making the task of trimming and pruning more enjoyable.
Creative Low-Cost Options: Glass Bottles and Gravel
Recycled glass bottles can create an eye-catching, budget-friendly border when sunk neck-down into soil. Glass bottle edging uses bottles spaced 2–4 inches apart, necks buried 3–4 inches for stability, creating a visible rim. Gravel edging provides a complementary option. Gravel edging requires a 3–6 inch deep trench lined with weed barriers, then 2–4 inches of 3⁄8–3⁄4 inch crushed stone evenly distributed. Both methods are low-cost alternatives that reuse recycled materials or inexpensive aggregates, and both support garden border edging definition. Installation allows creative expression with color patterns or mixed sizes, and measurements can be adjusted to suit beds 6–48 inches wide. These choices come to the rescue for minimal maintenance, permitting easy future adjustments without heavy tools. Additionally, breathable materials in garden shade sails enhance air circulation, making them an excellent companion for garden borders by providing sun protection without obstructing views.
Maintenance, Repair, and Seasonal Adjustment Tips
Inspect edging at least twice a year to catch problems early. Regular inspections of edging materials like concrete, stone, metal, plastic, rubber, and wood prevent shifting, rusting, and deterioration by identifying issues while small. For seasonal adjustment, allow 0.5–1 inch of movement for flexible plastic and rubber to accommodate soil settling and freeze-thaw cycles, and re-level loose sections after heavy rain. Maintenance tasks include trimming grass and weeds weekly within a 2–3 inch border to reduce repair needs. For wood, apply a protective sealant annually—use a penetrating oil or water-repellent preservative, 2 coats. Repair involves resetting stones on 1–2 inch compacted sand, and replacing corroded metal parts to restore structural integrity and overall durability. Consider investing in a WORX WG896 Corded Electric Lawn Edger for efficient edging work, as it offers powerful performance with its 12 Amp motor and adjustable features.
Frequently Asked Questions
What Are the Different Types of Edging?
They are natural stone, metal edging, plastic borders, wood timbers, brick pavers, concrete curbing, fabric landscape barriers, garden edging with living plants, and recycled materials, each offering distinct durability, aesthetics, installation and maintenance characteristics.
What Are Common Mistakes When Edging?
He answers bluntly: catastrophic results often follow from uneven installation, inadequate planning, material mismatch, neglecting drainage, improper spacing, lack of maintenance, ignoring soil type, choosing aesthetics over function, and skipping prep work.
What Is the Most Affordable Border Edging Option?
The most affordable border edging option is plastic edging. It offers budget friendly options and cost effective materials; DIY landscaping tips highlight affordable garden borders, value edging solutions, low cost edging, economical design choices, frugal garden projects and best bargains edging.
What Is the Best Technique for Edging?
The best technique balances precision cutting and tool selection: straight lines for formal garden beds, curved edges for natural flows, prioritizing material durability, seasonal considerations and maintenance practices to sustain landscape design harmony.